前言
这篇文章一直想咕,直到现在才开始咕咕咕。
此文只是简单想简单介绍下我的个人博客为什么最终选择了 Hexo 以及怎么“自动化”部署 Hexo 博客。
为何选择 Hexo
说到个人博客,业界老大哥wordpress和typecho必须要提一下。因为当初选择博客时我自然也尝试了这两款,但是的选择最终选择了 typecho,至于原因其实很简单,只是想要一个 markdown 简单的写作平台。
成功在学生机上部署 typecho 后为了“花里胡哨”,又入手了handsome主题。于是小康的第一个对外博客就有了:https://life.antmoe.com/(此站原数据已丢失。)
虽然 typecho 很便捷,但是对我而言,其实并不比 Hexo 便捷多少。首先谈谈我的个人习惯
- 习惯本地写作
- markdown,讨厌富文本
- 以技术类型博文为主
- 几乎没有非公开类型的博文
综上几点习惯,当初使用 typecho 时发送姿势:本地 typora 写好后复制到 typecho 后台,然后发表。
而 Hexo 就比较简单了,本地写好后 git 三连即可推送进行自动部署。
而 markdown 写作感受个人观点:typora yyds。
至于隐私类博文(想要加密)受职业影响 应该是不会有这种类型的博文的。
因此为了更好的写作体验,为了不改变习惯 最终选择了 Hexo。
Hexo 的自动化
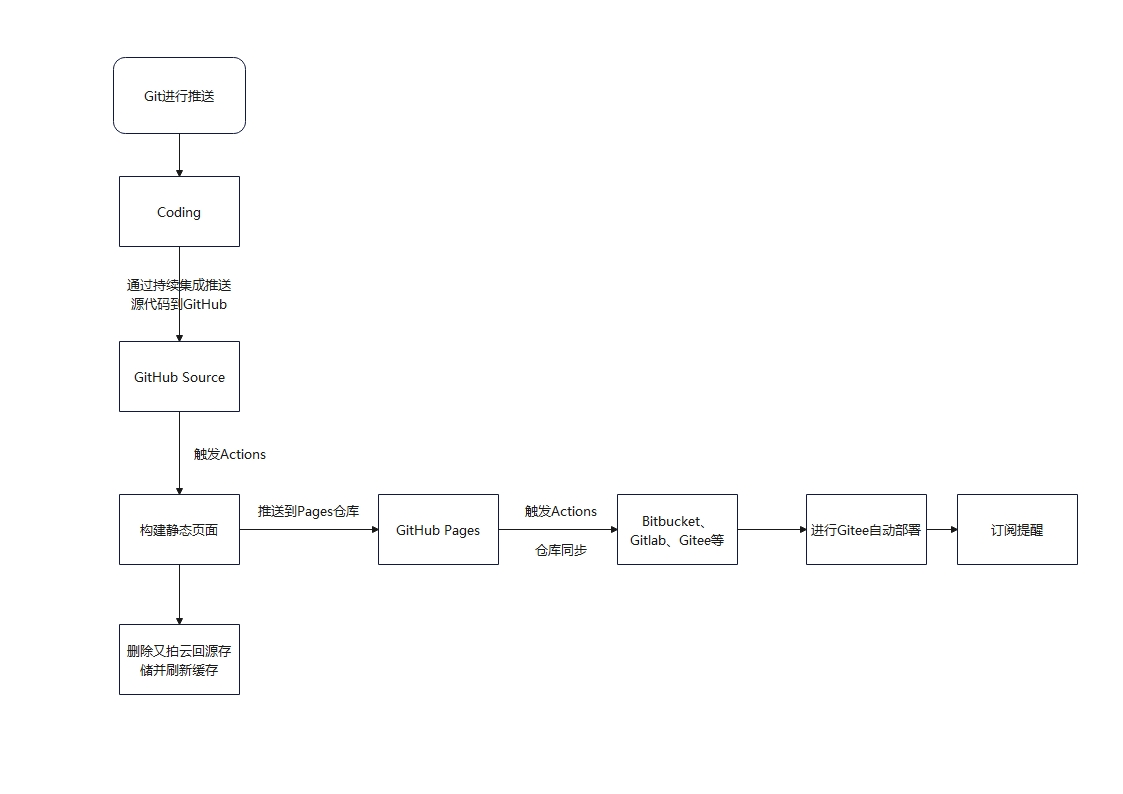
首先看一张流程图

- 推送到 Coding 后触发持续集成将代码推送到 GitHub 仓库(源码)
- GitHub 仓库推送代码后触发 Actions,进行构建静态页面
- 构建完静态页面后
- GitHub Pages 收到代码推送后进行Actions
- 同步静态页面到 Gitee、Bitbucket、Gitlab 等平台
- 进行 Gitee 部署
- 将新增/更新文章发送到Telegram 频道
以上便是我的博客自动化流程,个人认为完全不输动态博客。
虽然动态博客可以随时打开网页输入密码进行撰文,但是我个人是不会在手机进行撰文的。
因此只要撰文则一定使用的是 pc 端,那么对于在外时,下载一个 typora 难度也不大。
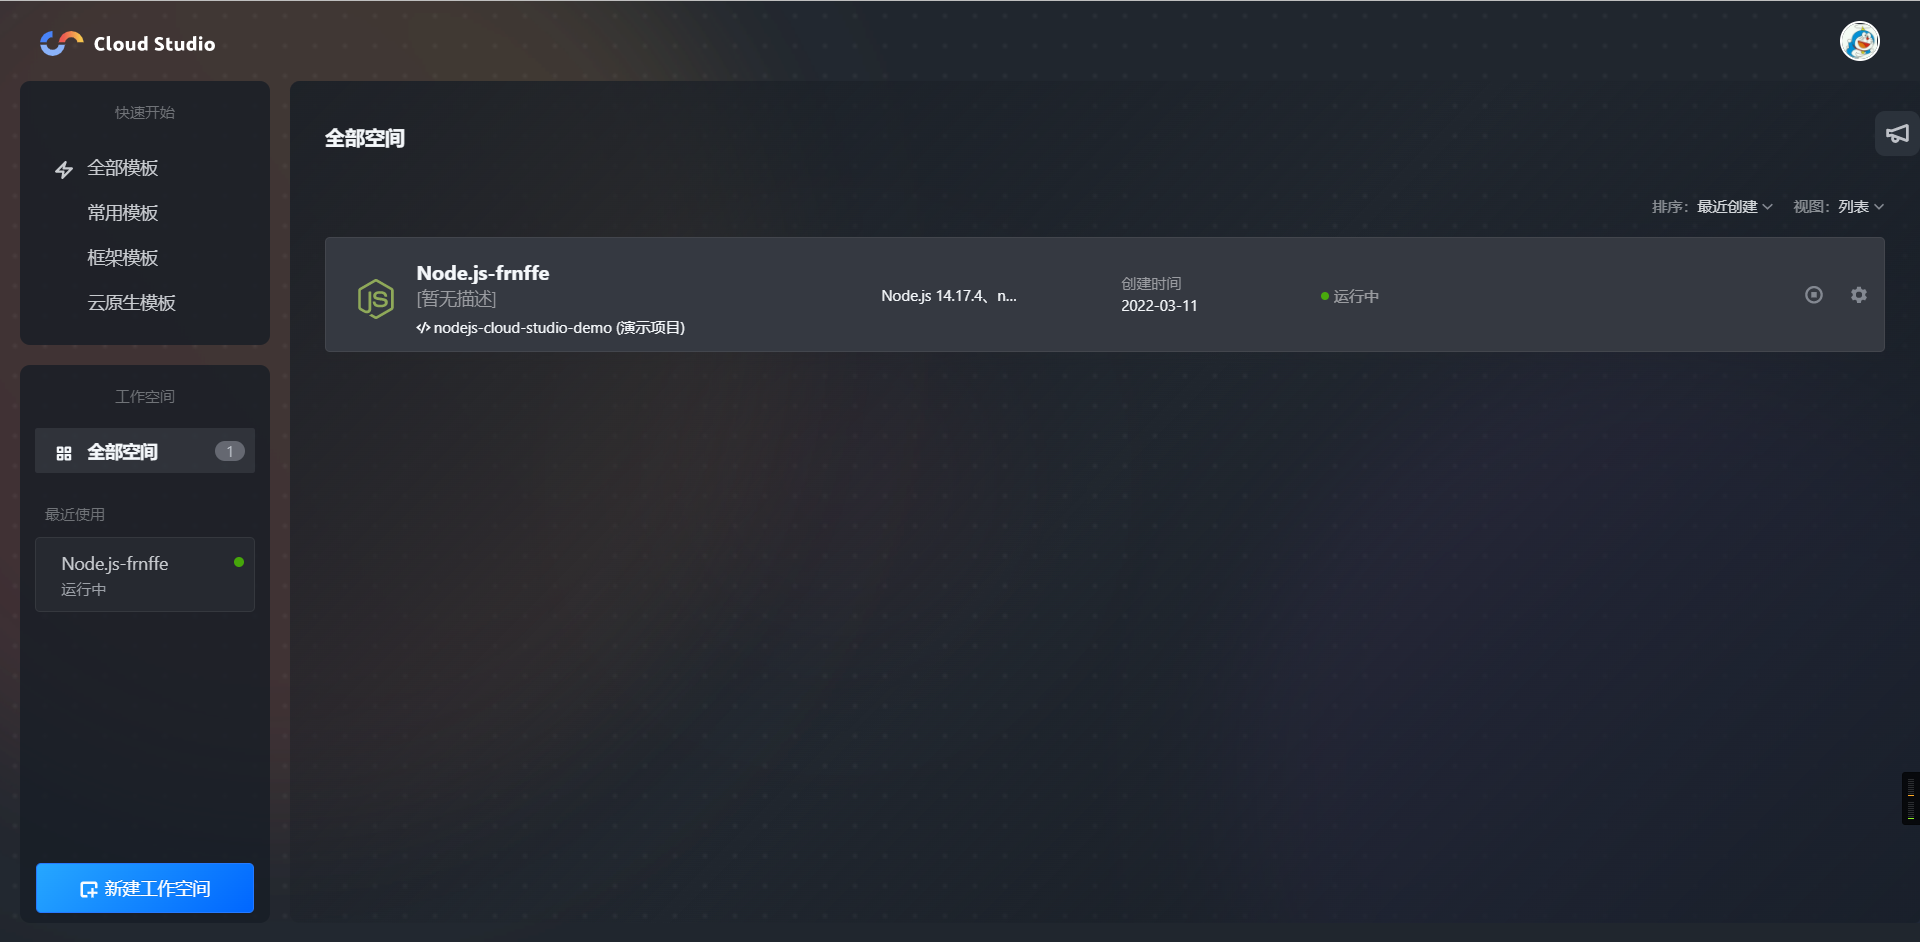
或者使用 coding 里的 Cloud Studio 进行云写作。
之所以第一步推送到 Coding 的目的
- 首先是受网络影响,直接推送到 GitHub 有时会推送不上
- 个人 GitHub 号曾经被封过一次,过渡阶段使用了 Coding。现在为了防止再次被封而导致源码丢失,因此放在国内的 Coding。
关于 CDN
小康这里选择的是又拍云,原因之一是因为免费,其二是因为它的源站资源迁移功能;其三则是边缘规则。
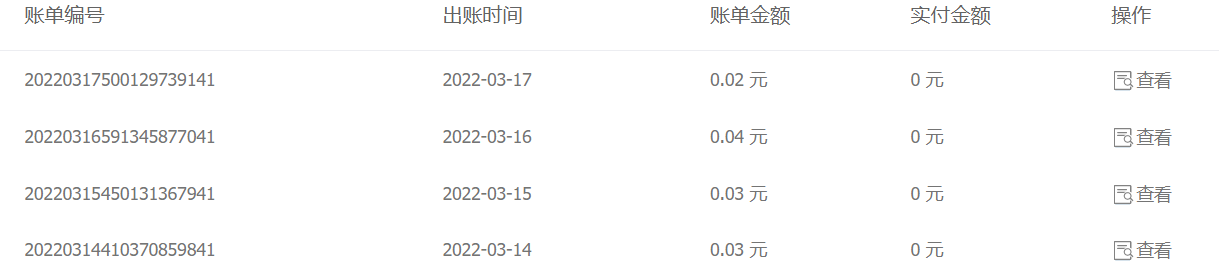
免费
所谓的免费指加入又拍云联盟后所发放的代金券,当前说多不多,说少不少。这点流量对象我这种小站来说应该算是够了。
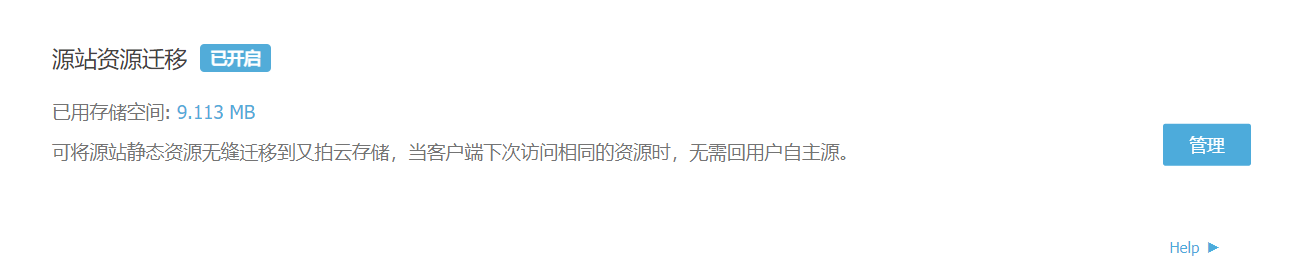
源站迁移
说到源站迁移,开启这个功能主要是想通过此功能减少 cdn 回源时的这部分流量。
不过如果 cdn 开启“永久”缓存的话其实我个人认为这个也是无所谓的。毕竟第一次回源是必然的。
边缘规则
这部分我主要是实施一些限速和重定向。例如:将访问 rss 或者 atom 文件重定向到镜像站。原因很简单,一般访问这两个文件的要么是爬虫,要么是订阅软件,正常用户很少会拿着这个文件来看。因此将其重定向到其他地方 避免消耗 CDN 流量。
GitHub Source 自动化
此部分详细介绍小康的 GitHub 源文件仓库 actions 文件。
此部分所实现的功能是构建静态文件,并推送到 GitHub pages 仓库;同时删除掉又拍云源站资源迁移的文件和又拍云缓存的 CDN。
1
2
3
4
5
6
7
8
9
10
11
12
13
14
15
16
17
18
19
20
21
22
23
24
25
26
27
28
29
30
31
32
33
34
35
36
37
38
39
40
41
42
43
44
45
46
47
48
49
50
51
52
53
54
55
56
57
58
59
| name: Hexo Blog CI
on:
push:
branches:
- master
jobs:
build:
runs-on: ubuntu-latest
strategy:
matrix:
node-version: [14.x]
steps:
- name: 1. 检查master分支
uses: actions/checkout@master
- name: 2. 设置Node.js
uses: actions/setup-node@master
with:
node-version: ${{ matrix.node-version }}
- name: 3. 缓存
uses: actions/cache@v2
id: cache-dependencies
with:
path: node_modules
key: ${{runner.OS}}-${{hashFiles('**/yarn.lock')}}
- name: 4. 安装插件
if: steps.cache-dependencies.outputs.cache-hit != 'true'
run: |
export TZ='Asia/Shanghai'
yarn install
- name: 5. 生成页面并压缩
run: |
export TZ='Asia/Shanghai'
yarn run build
cp -r ./static ./public
cp sync.yml ./public/.github/workflows/
cp package-public.json ./public/package.json
- name: 6. 部署页面
uses: JamesIves/[email protected]
with:
branch: master
folder: public
repository-name: kkfive/kkfive.github.io
clean: false
ssh-key: ${{ secrets.DEPLOY_KEY }}
- name: 7. 刷新又拍云缓存
env:
UPYUN_SERVICES: ${{ secrets.UPYUN_SERVICES }}
UPYUN_OPERATOR: ${{ secrets.UPYUN_OPERATOR }}
UPYUN_PASSWORD: ${{ secrets.UPYUN_PASSWORD }}
UPYUN_TOKEN: ${{ secrets.UPYUN_TOKEN }}
run: |
ls
node upyun.js
|
第五步中sync.yml是 GitHub pages 仓库中用于将页面同步到其他仓库的 actions 配置文件。
package-public.json文件则是运行JavaScript脚本时所需要的依赖项。
第七步中刷新又拍云缓存脚本参考如下:
1
2
3
4
5
6
7
8
9
10
11
12
13
14
15
16
17
18
19
20
21
22
23
24
25
26
27
28
29
30
31
32
33
34
35
36
37
38
39
40
41
42
43
44
| const upyun = require('upyun')
const axios = require('axios')
const serviceName = process.env.UPYUN_SERVICES
const operatorName = process.env.UPYUN_OPERATOR
const operatorPassword = process.env.UPYUN_PASSWORD
const cacheToken = process.env.UPYUN_TOKEN
const service = new upyun.Service(serviceName, operatorName, operatorPassword)
const client = new upyun.Client(service)
async function getFileList(dir) {
const res = await client.listDir(dir, { limit: 10000 })
if (res) {
res.files.forEach(async (item) => {
if (item.type === 'F') {
await getFileList(dir + item.name + '/')
} else if (item.type === 'N') {
client.deleteFile(dir + item.name).then((res) => {
console.log(`${dir + item.name}删除结果:${res}`)
})
}
})
}
}
getFileList('/').then((res) => {
axios
.post(
'https://api.upyun.com/buckets/purge/batch',
{
noif: 1,
source_url: 'https://blog.antmoe.com/*'
},
{
headers: {
Authorization: 'Bearer ' + cacheToken
}
}
)
.then((res) => {
console.log(res.data)
})
.catch((err) => {
console.log(err)
})
})
|
此脚本需要安装依赖upyun和axios。获取又拍云 TOKEN 参考:
GitHub Pages 同步页面
此文中距离的文件内容可能有调整,请以sync.yml为准。
1
2
3
4
5
6
7
8
9
10
11
12
13
14
15
16
17
18
19
20
21
22
23
24
25
26
27
28
29
30
31
32
33
34
35
36
37
38
39
40
41
42
43
44
45
46
47
48
49
50
51
52
53
54
55
56
57
| name: sync
on:
push:
branches:
- master
jobs:
build:
runs-on: ubuntu-latest
strategy:
matrix:
node-version: [14.x]
steps:
- name: 1. 检查master分支
uses: actions/checkout@master
with:
fetch-depth: 0
- name: 2. Sync to Gitee
uses: wearerequired/git-mirror-action@master
env:
SSH_PRIVATE_KEY: ${{ secrets.DEPLOY_KEY }}
with:
source-repo: [email protected]:kkfive/kkfive.github.io.git
destination-repo: [email protected]:kkfive/kkfive.git
- name: 3. 自动部署gitee
uses: yanglbme/gitee-pages-action@master
with:
gitee-username: kkfive
gitee-password: ${{ secrets.GITEE_PASSWORD }}
gitee-repo: kkfive/kkfive
- name: 4. Sync to Bitbucket
uses: wearerequired/git-mirror-action@master
env:
SSH_PRIVATE_KEY: ${{ secrets.DEPLOY_KEY }}
with:
source-repo: [email protected]:kkfive/kkfive.github.io.git
destination-repo: [email protected]:DreamyTZK/blog.antmoe.com.git
- name: 5. Sync to Telegram
env:
BOT_TOKEN: ${{ secrets.BOT_TOKEN }}
run: |
yarn install
node sync-message.js
|
由于 gitee 部署需要一定的时间,因此第一步我选择了优先推送 gitee,并在推送完成后自动部署 gitee。然后在推送到其他镜像仓库。
至于 vercel、cloudflare page 则是自动关联 GitHub 仓库无需主动推送。因此在 actions 中可以不用对其操作。
第五步主动推送更新内容到 Telegram,此步骤为个人所需。原因很简单,我一直想要一个更新日志的记录,但每次部署都需要手动去更新一下页面属实是不舒服。
因此我决定通过脚本自动获取文章或页面的update与上一次更新日期做比对,如果不相同则说明有更新。参考脚本如下:
1
2
3
4
5
6
7
8
9
10
11
12
13
14
15
16
17
18
19
20
21
22
23
24
25
26
27
28
29
30
31
32
33
34
35
36
37
38
39
40
41
42
43
44
45
46
47
48
49
50
51
52
53
54
55
56
57
58
59
60
61
62
63
64
65
66
67
68
69
70
71
72
| const { default: axios } = require('axios')
const fs = require('hexo-fs')
const changeList = []
function isToday(date) {
var d = new Date(date.toString().replace(/-/g, '/'))
var todaysDate = new Date()
if (d.setHours(0, 0, 0, 0) == todaysDate.setHours(0, 0, 0, 0)) {
return true
} else {
return false
}
}
async function getOldChange() {
try {
const result = await axios.get('https://kkfive.gitee.io/changePosts.json')
return result.data.map((item) => {
return {
...item,
date: new Date(item.date),
update: new Date(item.update)
}
})
} catch (e) {
return []
}
}
function checkInOldList(item, oldList) {
return oldList.find((oldItem) => {
if (oldItem.link === item.link) {
if (
new Date(oldItem.date) - new Date(item.date) === 0 &&
new Date(oldItem.update) - new Date(item.update) === 0
) {
return true
}
}
})
}
hexo.extend.filter.register('after_post_render', function (data) {
if (data.layout === 'post' || data.layout === 'page') {
const dateTime = new Date(data.date)
const updateTime = new Date(data.update)
changeList.push({
title: data.title,
date: dateTime,
update: updateTime,
link: data.permalink
})
}
return data
})
hexo.extend.filter.register('before_exit', async function () {
const oldListData = await getOldChange()
const resultList = changeList.filter((item) => {
if (isToday(item.update)) {
if (!checkInOldList(item, oldListData)) {
console.log('当前对象是今天更新的', item)
return item
}
}
})
fs.writeFileSync(
`${hexo.config.public_dir}/changePosts.json`,
JSON.stringify(resultList)
)
})
|
将此文件保存在博客根目录下的scripts目录下即可(没有就新建)。文件名任意即可。
为了实现更新日志的功能,避免尴尬推送,推送时还需要读取一次用于记录更新记录的文件。
详情效果参考:小康的部落格
1
2
3
4
5
6
7
8
9
10
11
12
13
14
15
16
17
18
19
20
21
22
23
24
25
26
27
28
29
30
31
32
33
34
35
36
37
38
| const Slimbot = require('slimbot')
const fs = require('fs')
const updateMessage = fs.readFileSync('./update.md')
const { BOT_TOKEN } = process.env
const slimbot = new Slimbot(BOT_TOKEN)
const chatID = -1001330491561
const config = {
parse_mode: 'Markdown',
disable_web_page_preview: false,
disable_notification: false
}
const imageRegex = /(?:!\[(.*?)\]\((.*?)\))/g
const contentFile = fs.readFileSync('./changePosts.json')
const contentJson = JSON.parse(contentFile)
let content = updateMessage.toString()
contentJson.forEach((item) => {
content += `
[${item.title}](${item.link})`
})
content += `
[小康博客](https://blog.antmoe.com)正在重新部署,建议30分钟后查看`
const emptyContent = `[小康博客](https://blog.antmoe.com)又触发部署了呢,不过并没有更新文章和页面,也没有更新日志。
可能是因为[小康](https://blog.antmoe.com)太勤快忘了写吧!
`
if (contentJson.length > 0 || content.length > 0) {
slimbot.sendMessage(chatID, content, config)
} else {
slimbot.sendMessage(chatID, emptyContent, config)
}
|